# Installing SLYR
SLYR is available in two versions. Depending on whether you are using the community edition or the full-feature licensed edition, the installation process varies.
# Installing SLYR (Community Edition)
To install the SLYR (Community Edition), open the Plugin Manager, click
on the top menu item Plugins ▶️ Manage and Install Plugins.

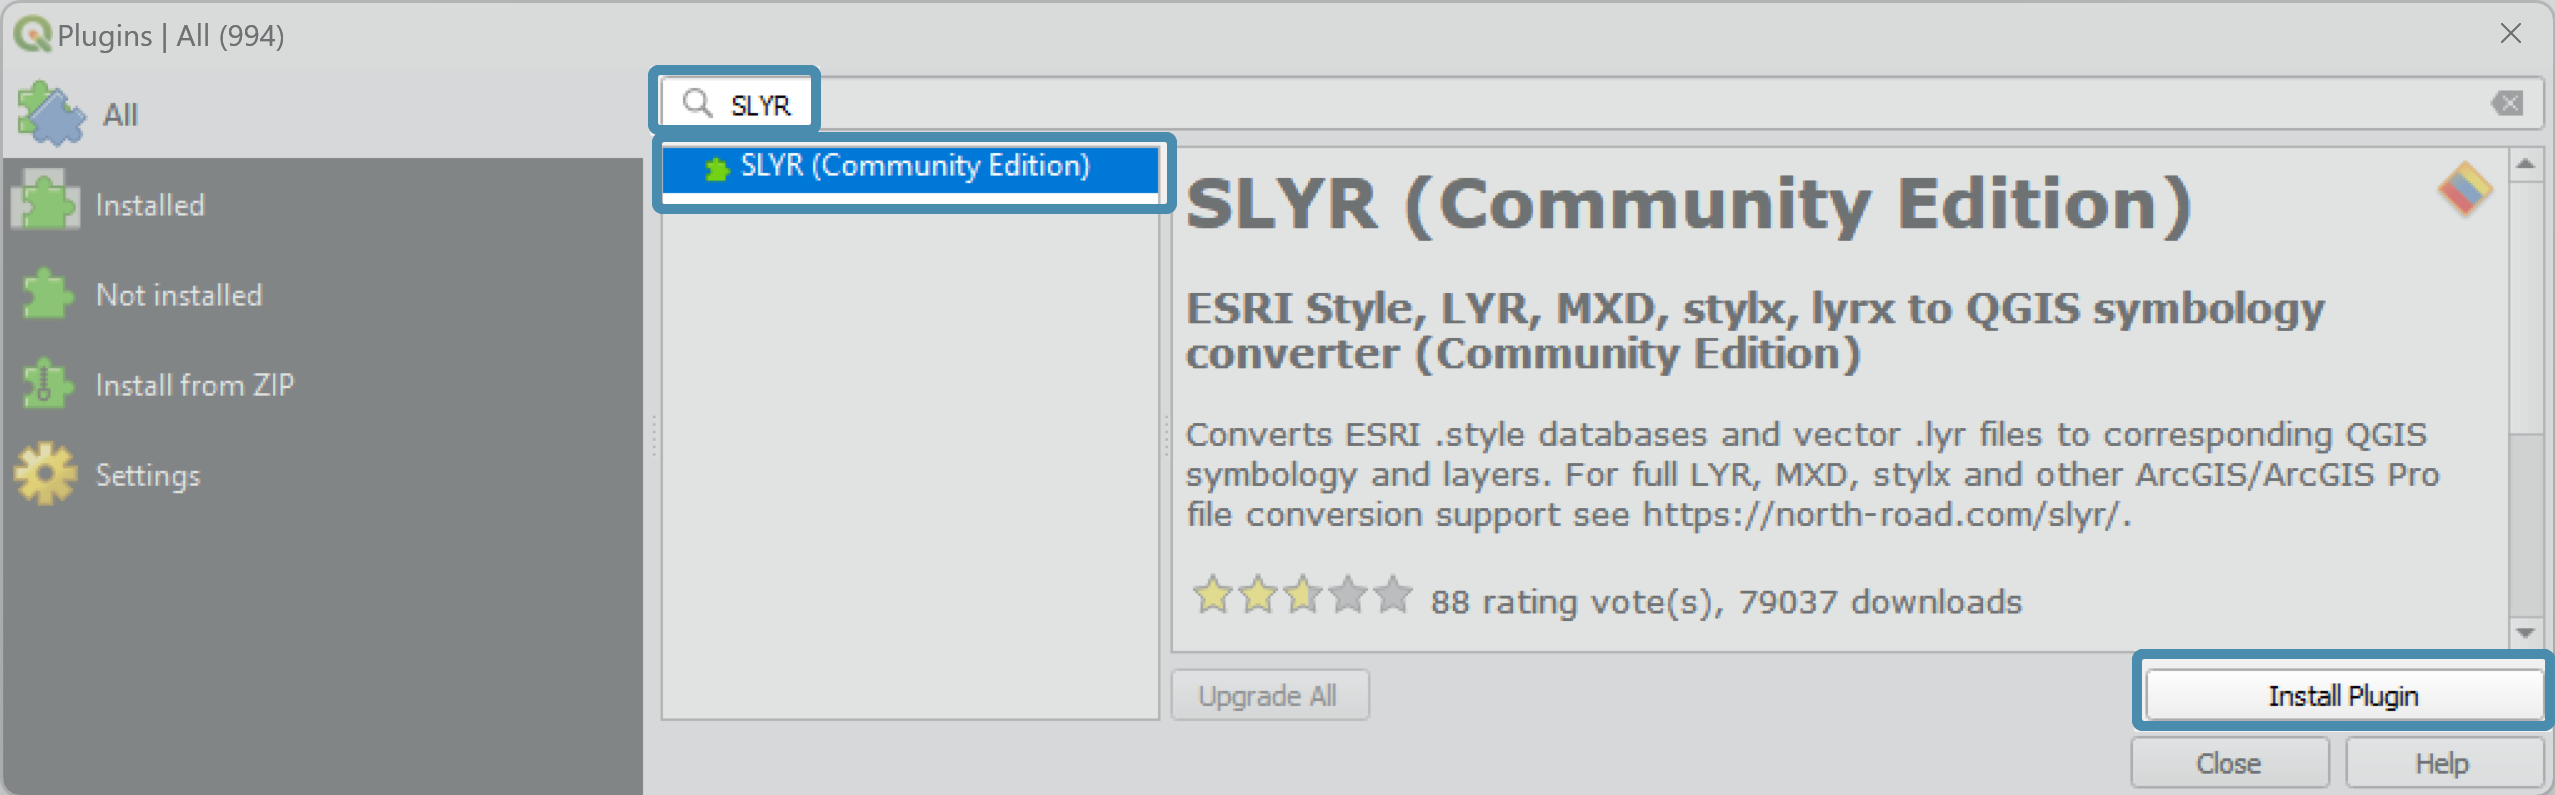
In the dialog that opens, type SLYR in the search bar.
In the middle panel, click on the SLYR (Community Edition) and then click
on Install Plugin.
 The Plugin Manager will then run the Install for you. When the install has
completed, click on
The Plugin Manager will then run the Install for you. When the install has
completed, click on Close.
Any further updates to the SLYR plugin will be available to you within the Plugin Manager.
The SLYR (Community Edition) will appear in the browser panel. Expand the tools and start using them.
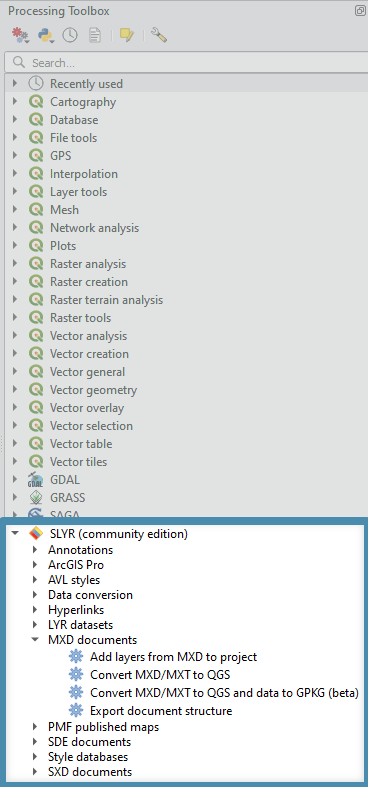
The SLYR (Community Edition) has limited tools - check the SLYR Blog (opens new window) for availability as we update tool accessibility once we have reached our funding goals. A tool will return an error if it is only available in the fully licensed SLYR.
# Installing SLYR (licensed version)
Once purchased, licensed users will receive an email from North Road with a link for the installer and their license key.
Before installing the licensed version of SLYR, you must first uninstall the community version (if installed) and restart QGIS.
Save the information in this email, along with your invoice and receipt in a safe place for future reference.
Download the installer from the link.
- Place the zip file in a safe location for future reference - just in case you need to update your machine so you can reload it.
Unzip the downloaded file, and then drag the extracted
install_slyr_qgis.pyover an open QGIS window. (If prompted, accept the warning regarding trusted scripts). The script will add a connection to the private plugins repository, and install the SLYR plugin for you.After the plugin is installed, the SLYR
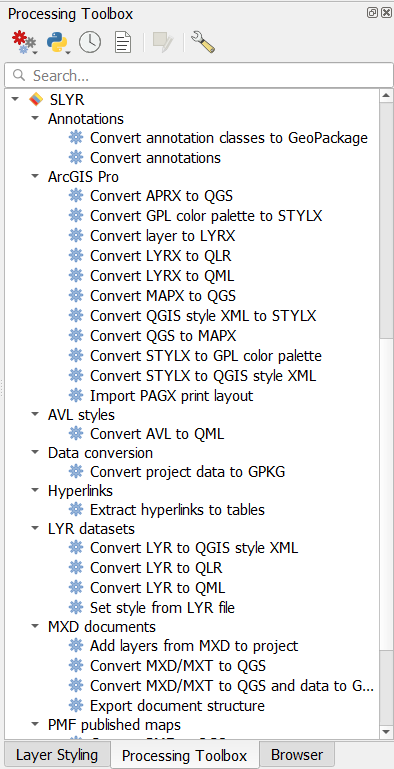
Optionsdialog will open (If it doesn't, click on the top menuSettings▶️Optionsand click on * SLYR* in the left panel). Enter your unique license key at this screen, exactly as it appears at the end of this email. Enter the optional requirements outlined in the SLYR Options section.Once installed, SLYR will appear in the browser panel. Expand the tools and start using them.
# Updating SLYR
SLYR is updated regularly. All updates are available through the QGIS Plugin Manager (for both the Community and Licensed versions), and QGIS itself will let you know when a new version of SLYR is available.
To update your version:
From within QGIS, open the Plugin Manager, by clicking on the top menu item
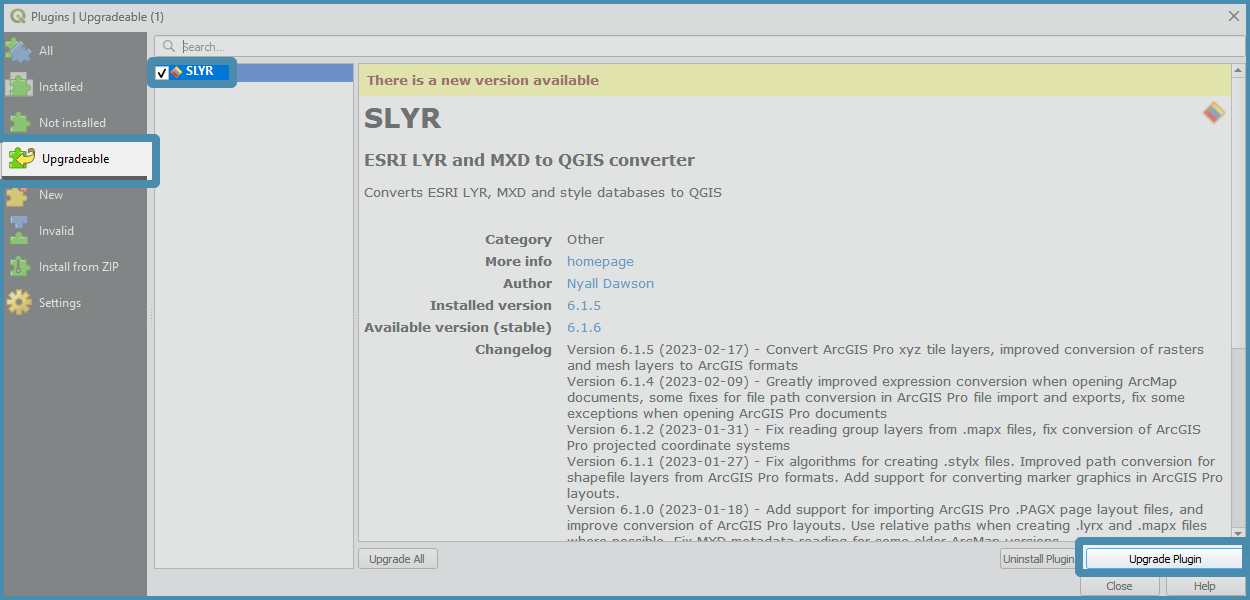
Plugins▶️Manage and Install Plugins.In the left panel, click on
UpgradeableIn the central panel, click on
SLYR. IfSLYRis not listed, then you're already running the latest release.On the lower right, click on
Upgrade Plugin. Once upgraded, click onClose.
If you receive an error after the plugin updates, try restarting your QGIS. If you still encounter an error, please email us for support.
# Silent Installations
A silent install is used to install an application without the need to interact with the UI. This type of installation is helpful for applications with limited installation steps. There are a number of approaches which can be used to silently install SLYR, with the recommended approach varying depending on how QGIS itself is deployed within an organization.
A common approach is to package up a "template" QGIS user profile, and deploy that along with the organisation's QGIS installation package or script. A user's QGIS settings are all stored within the %AppData%\QGIS\QGIS3\profiles\default path.
To create a template profile:
1. Run QGIS, install the SLYR plugin (and any other default plugins you want deployed to your users), and change any default QGIS options as desired.
2. ZIP/package up the resultant %AppData%\QGIS\QGIS3\profiles\default folder, including the %AppData%\QGIS\QGIS3\profiles\default\python\plugins\slyr folder.
3. As part of your QGIS installation script, extract the default user profile into the user's %AppData%\QGIS\QGIS3\profiles\default folder.
If you are not copying the QGIS settings ini as part of the deployment, then you will also need to set the SLYR license key the user's QGIS profile. This can be done programatically by calling a Python command:
QgsSettings().setValue('/plugins/slyr/license', 'your license key value')
See the QGIS Documentation (opens new window) for instructions on how a Python command can be run automatically at QGIS startup.